| Table of Contents |
|---|
...
The breadcrumb navigation at top shows where you are the location in the hierarchy (which is how you segregate and control access to content is segregated and controlled). The hierarchy is based on one-to-many relationships:
...
| Info |
|---|
ImportantWhat is visible in the Content UI is controlled and protected by access permissions. A Domain admin , for example, will is not be able to see anything (domains, tenants, clusters) outside of the domain that they are authorized to manage.
|
...
The admin users for the Content UI are defined during the Gateway installation, via a root policy configuration file that grants full cluster permissions to a specific LDAP group or list of users.
| Info |
|---|
NoteYou An authorized user must login as an authorized user. There is no anonymous access to the Content UI. |
Cluster | To log in as a cluster administrator, browse Browse to the cluster's Content UI and use the login name and password created for the Root administrator to log in as a cluster administrator:
The
| |||||||
|---|---|---|---|---|---|---|---|---|
Tenant or Domain | To log in as a tenant or domain administrator, browse to a domain's Content UI and log in with your the admin credentials:
The Content UI opens to the domain’s page, from which you can access the tenant's information can be accessed (if allowed) by clicking the breadcrumb menu. | |||||||
Different Tenant or Domain | To log into in to a different tenant or domain with your the existing credentials, specify your the tenant or domain after your the user name:
|
Creating a tenant
From the list of Tenants, click the Add button.
Type in the name of the new tenant. (See Naming Rules for Swarm.)
Press Enter or click the Add button again to save it.
| Info |
|---|
NoteThe SYSTEM TENANT has no owner or configuration options; it is the permanent system-created tenant that manages any storage domain that is not associated with another tenant. |
...
Click on a tenant to view the list of domains within it.
To Click the Add button to create a domain, click the Add button.
Type in the name of the new domain. (See Naming Rules for Swarm.)
Select Add to save it.
...
Click on a domain to view the contents within it.
To Click the Add button to create a bucket, click the Add button.
 If you need to use
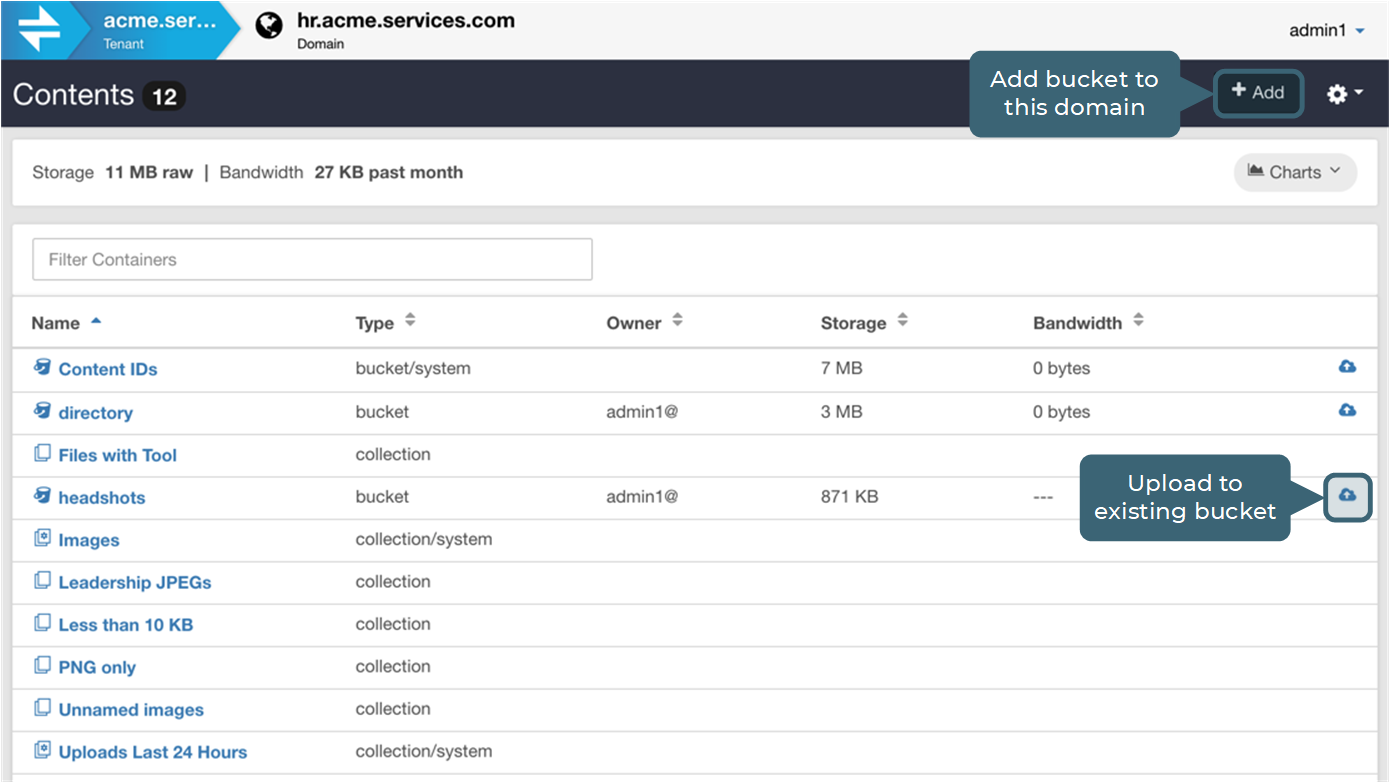
Clear the S3 Compatible checkbox if a non-S3-compliant name , clear the S3 Compatible checkboxneeds to be used.
Type in the name of the new bucket. (See Naming Rules for Swarm.)
Select Add to save it.
See Configuring Buckets.
Uploading content
From Click the Uploads button from the bucket view, click the Uploads button.


Set the Retention time if you do not want the default is not desired (Keep until deleted).
(optional) Click Settings to set custom options for file naming and metadata tagging:


Click Add to browse to local files or drag and drop them directly onto the upload area to queue them for upload:
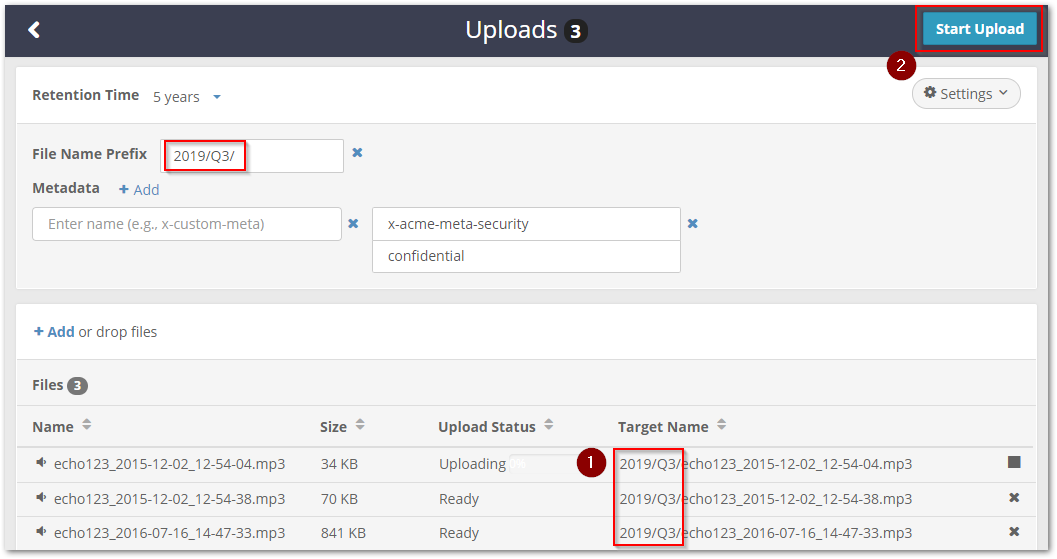
Info title Tip Check the Target Name column to validate the final object names before you start the upload. There is no name prefix option available when uploading files as Content IDs. Click the Start Upload button to launch the upload with these settings.
...
Creating a search collection
When you add a Collection, you are defining and running a new search. After you view the results, you can save it A new search is defined and run when a collection is added. The results can be saved as a named collection , for future use after viewing the results.
Click on the domain name in the breadcrumbs bar to return to the domain.
To Click the Search button to create a collection (which is a saved search), click the Search button.
Search for some of the uploaded data and click the Refresh button to rerun your the search:


Filter Objects - for string searches on object names.
Search Scope - search the entire domain, unnamed objects (Content IDs), or a specific bucket.
+ Add Search Criteria - specify a new search filter, such as Type equal to the string
text.+ Add Column Headers - customize the view the list of matched content on the bottom half of the screen.
To Click the Save As button at top right to save the search and display as a collection for future use, click the Save As button at top right.
See Search Collections.
Resources
Located at the top right of the Content UI is your the account name, which drops down a menu of resources:
...